Ultimate Wheat Farming Guide for Beginners: Everything You Need to Know
Introduction
Wheat farming plays a vital role in global agriculture, nourishing millions and bolstering economies around the world. As one of the most extensively grown crops, wheat supplies essential nutrients for both humans and livestock. Grasping the complexities of wheat farming is essential for farmers aiming to maximize yields and maintain productivity. This guide provides a thorough, step-by-step method for cultivating wheat, equipping farmers with the necessary knowledge to thrive in this important field.
Importance of Wheat Farming
Wheat farming is crucial for ensuring food security and maintaining economic stability. As a staple for billions of people, wheat is a key component of many diets around the world. Its adaptability allows it to be made into a variety of products, including bread and pasta. In addition to its dietary importance, wheat farming provides jobs and supports rural communities, contributing to local economies. Moreover, wheat is a hardy crop that thrives in different climates, making it an important resource for countries with varied agricultural conditions. Advances in farming methods and technology have also improved wheat farming productivity, solidifying its role in today’s agricultural landscape.
Global and Regional Significance of Wheat Production
Wheat is grown in over 120 countries, making it the third most-produced cereal after maize and rice. Major producers like China, India, Russia, and the United States account for a large portion of the global supply. Its ability to thrive in various climates allows wheat to be cultivated in both temperate and semi-arid regions, leading to its widespread growth.
Regionally, wheat farming is especially important. In South Asia, it is a staple food that nourishes millions every day. European countries depend on wheat for their baking and export sectors, while in North America, wheat farming is a key part of the agricultural economy. In Pakistan, wheat cultivation is vital for the livelihoods of many farmers and plays a significant role in the country’s GDP and food security. Understanding the local farming practices and challenges is crucial for improving yields and ensuring sustainability.
Objectives of This Guide
The main aim of this guide is to offer farmers a straightforward and practical approach to successful wheat farming. From choosing the right seeds to managing the harvest, every step is crafted to enhance efficiency and yield. Additionally, this guide emphasizes the significance of incorporating modern technologies and sustainable practices to tackle issues such as climate change and resource limitations. By the end of this guide, farmers will have the knowledge necessary to: – Recognize the ideal conditions for wheat farming. – Apply best practices for soil preparation, planting, and crop management. – Tackle common challenges, including pests, diseases, and weeds. – Utilize modern agricultural technologies to boost productivity and cut costs. In summary, wheat farming is not just an agricultural activity—it serves as a vital source of livelihood for millions. With the right knowledge and resources, farmers can achieve successful harvests and play a crucial role in global food security. Let’s explore each step of the wheat farming process in more detail to fully realize its potential.
Understanding Wheat Farming
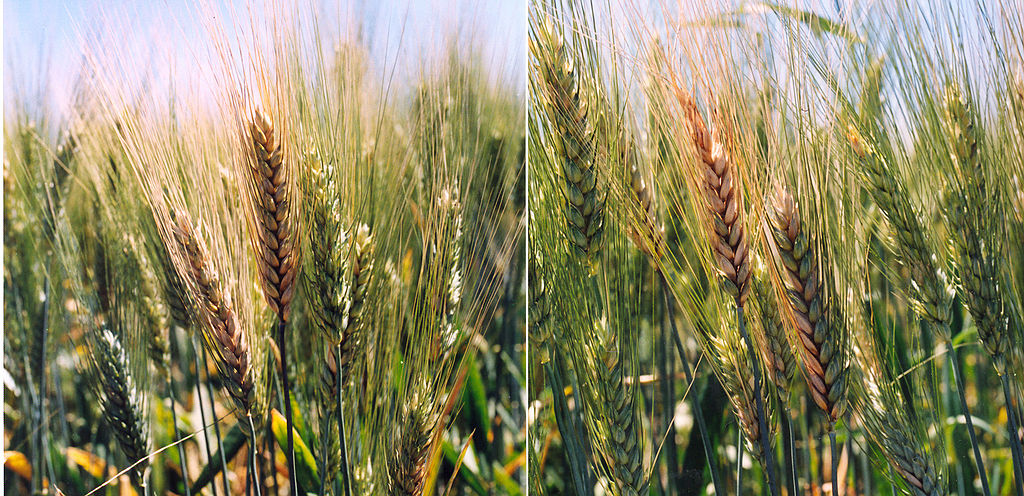
Wheat Varieties: Choosing the Right Type
Choosing the right wheat variety is essential for a successful harvest. Various wheat types are adapted to different climates, soil conditions, and intended uses. The main categories of wheat include:
- Hard Red Wheat: This variety is perfect for bread and other baked goods, thriving in cooler climates.
- Soft Red Wheat: Often used for pastries and cakes, it flourishes in areas with moderate rainfall.
- Durum Wheat: Renowned for its high protein content, durum wheat is mainly used for pasta and flour production.
- Spring Wheat and Winter Wheat: Spring wheat is planted in the spring and harvested in late summer, while winter wheat is sown in the fall and harvested the following summer. The choice between them depends on local climate conditions and the farmer’s planting schedule.
Farmers need to take into account factors like yield potential, disease resistance, and market demand when selecting a variety. Consulting with local agricultural experts or extension services can provide valuable insights into the best options for a specific area
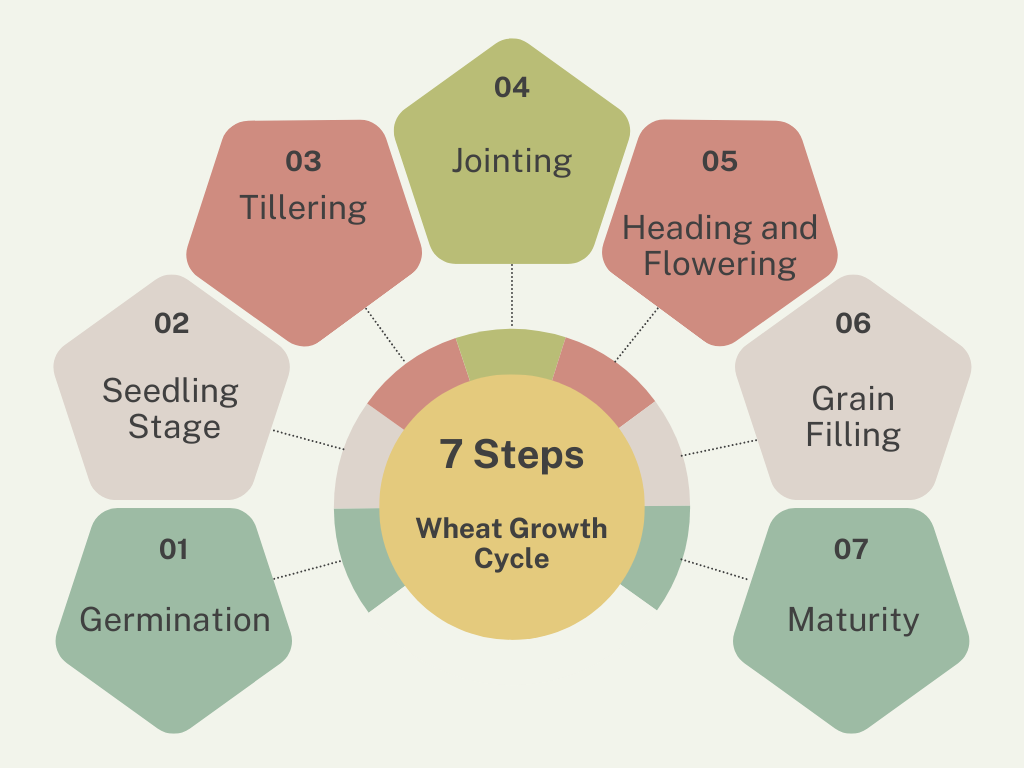
Wheat Growth Cycle
Understanding the growth cycle of wheat is crucial for effective crop management. Wheat goes through several stages of development:
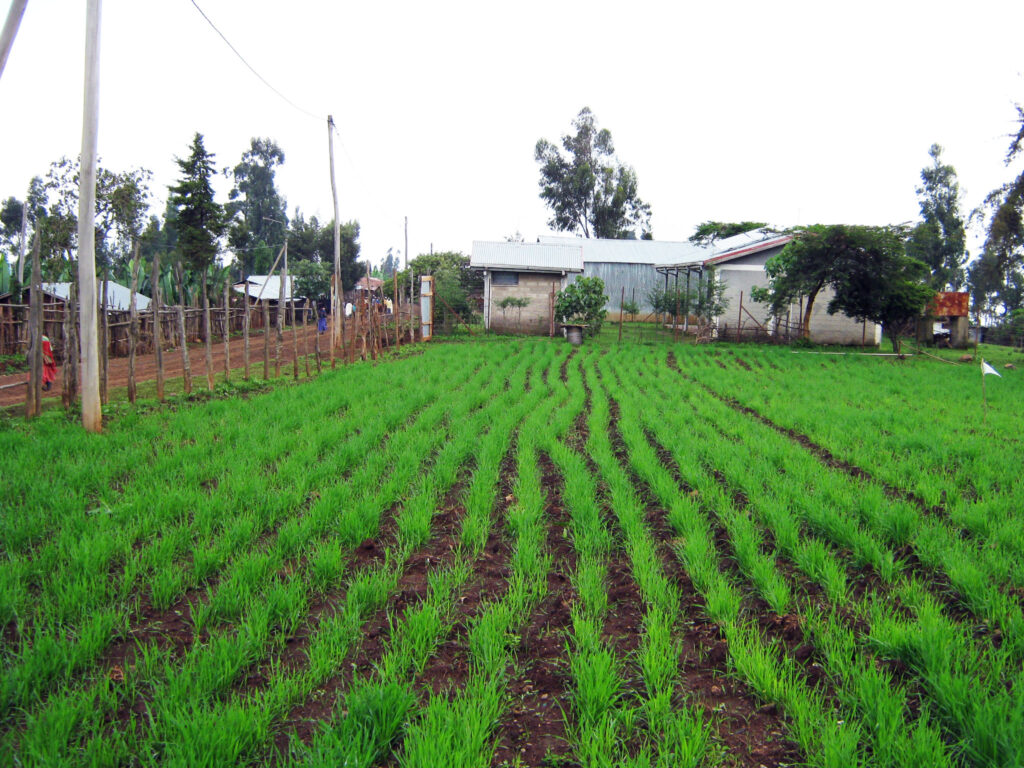
- Germination: After planting, wheat seeds take in water, swell, and start to sprout. This process typically occurs within 3 to 10 days, depending on temperature and soil conditions.
- Seedling Stage: Once germination is complete, the seedling breaks through the soil. This stage is vital for developing strong roots and healthy shoots, requiring adequate water and nutrients.
- Tillering: At this stage, the wheat plant produces additional stems, known as tillers, from its base. Each tiller can potentially form a wheat head, which directly affects yield. Proper fertilization and weed management are essential during this phase.
- Jointing: During jointing, the main stem grows taller, and nodes (joints) begin to form. It’s important for farmers to provide enough nitrogen to support this growth.
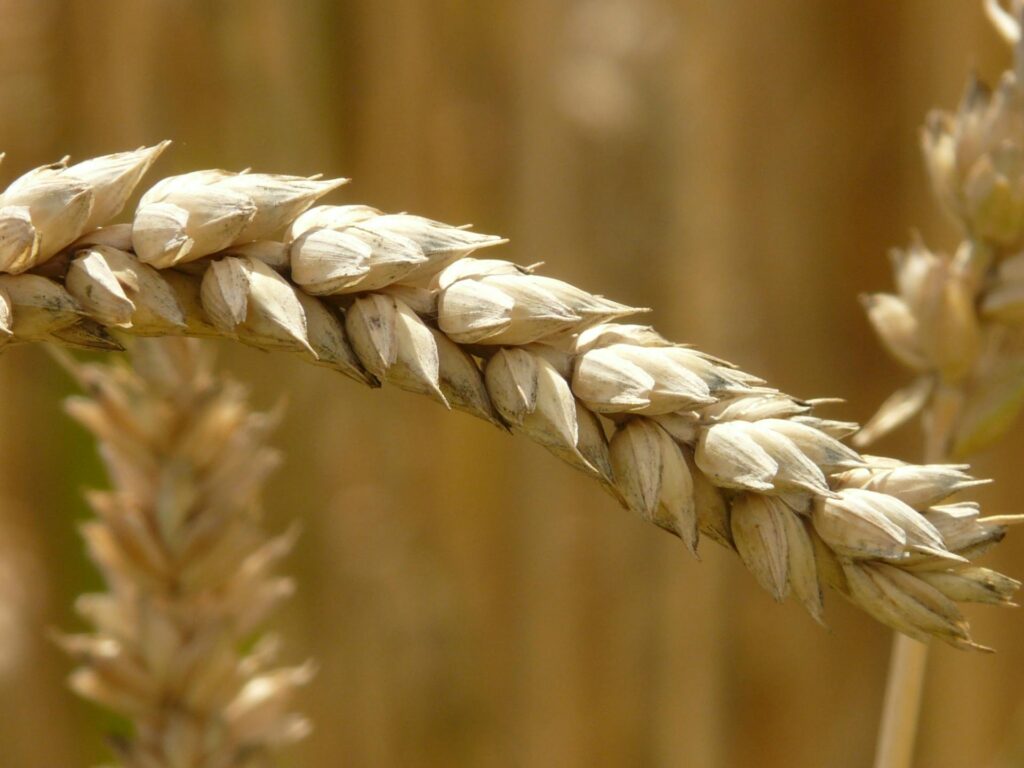
- Heading and Flowering: The wheat head appears, and flowering starts. This stage is critical for grain development, as any stress from drought, heat, or pests can greatly reduce yields.
- Grain Filling: Following flowering, the wheat kernels develop and fill with starch. Effective water and nutrient management are key to maximizing kernel size and weight.
- Maturity: The wheat crop is considered mature when the kernels harden and the plants turn golden brown, signaling that it’s time for harvest. By understanding the wheat growth cycle, farmers can better time their interventions, such as irrigation, fertilization, and pest control, to enhance yield and quality.
Optimal Conditions for Wheat Farming
Climate Requirements
Wheat is a highly adaptable crop that can flourish in a variety of climates, but it tends to be most productive in temperate regions. Important climate factors include:
- Temperature: Wheat grows best in moderate temperatures. The ideal ranges are:
- Germination and early growth: 12–25°C (54–77°F).
- Heading and flowering: 15–22°C (59–72°F).
- Grain filling: 20–25°C (68–77°F). Very high temperatures, particularly during the flowering and grain-filling stages, can negatively impact yields due to heat stress.
- Rainfall: Sufficient rainfall is crucial, with an optimal range of 30–40 cm (12–16 inches) throughout the growing season. However, too much rain can cause waterlogging, while too little may necessitate additional irrigation.
- Sunlight: Wheat does best in regions with plenty of sunlight, especially during the grain-filling period. Longer day lengths contribute to improved growth and higher yields.
Soil Types and Fertility
Wheat thrives in well-drained, fertile soils that retain water and allow for good aeration. Here are some important factors to consider:
- Soil Type: Loamy soils that are rich in organic matter are the best for wheat cultivation. They strike a good balance between drainage and moisture retention. Sandy soils can be enhanced with organic materials, while clay soils require proper drainage solutions.
- pH Range: Wheat grows best in slightly acidic to neutral pH levels, generally between 6.0 and 7.5. Soils that are too acidic or alkaline may need amendments such as lime or gypsum to adjust the pH.
- Nutrient Requirements: Wheat is a crop that requires a lot of nutrients, so managing soil fertility is crucial. The key nutrients include: Nitrogen (N): Essential for promoting healthy leaf and stem growth. Phosphorus (P): Important for root development and grain yield. Potassium (K): Helps improve disease resistance and overall plant health. Regular soil testing is vital to assess nutrient levels and create an effective fertilization strategy.
Regional Variations in Conditions
Wheat farming conditions differ greatly depending on the region. Here are some examples:
- Temperate Zones: In countries such as the United States, Canada, and parts of Europe, wheat is cultivated in cool, temperate climates. Winter wheat is prevalent in these areas, taking advantage of a dormancy period during the winter months.
- Tropical and Subtropical Regions: In nations like India and Pakistan, wheat is planted in the winter (Rabi season) to escape the intense summer heat. These areas often rely on irrigation to make up for insufficient rainfall.
- Arid and Semi-Arid Regions: In places like Australia and parts of the Middle East, wheat varieties that thrive in dry conditions are grown. Here, drought-resistant varieties and efficient water management practices are essential.
- High Altitudes: In mountainous areas, wheat is cultivated during a brief growing season. Farmers typically use early-maturing varieties to adapt to the cooler climate. By recognizing these ideal conditions, farmers can adjust their methods to enhance productivity and meet regional challenges.
Step 1: Land Preparation
Effective land preparation is crucial for a successful wheat farming operation. This phase guarantees that the soil is adequately prepared to foster healthy crop growth, creating the perfect conditions for seeds to germinate and flourish.
Soil Testing and Analysis
Before preparing the land, it’s important to evaluate the health and fertility of the soil.
- Sampling: Gather soil samples from various spots in the field at depths of 6–12 inches.
- Testing: Perform soil tests to check pH levels, organic matter content, and the availability of essential nutrients such as nitrogen (N), phosphorus (P), and potassium (K).
- Recommendations: Based on the findings, apply lime to adjust acidity or gypsum for saline-alkaline soils. Address nutrient deficiencies with appropriate fertilizers or amendments.
Soil testing serves as a guide for managing fertility and enhancing soil structure, which ultimately leads to healthier crops.
Plowing, Tilling, and Leveling
Preparing the soil physically is the next important step:
- Plowing: Start by using a plow to turn over the top layer of soil. This process:
- Breaks up compacted soil.
- Mixes in crop residues and organic matter.
- Enhances aeration and allows better water infiltration.

- Tilling: Once plowing is done, till the soil to break it into finer particles. This step improves:
- Seedbed uniformity.
- Root penetration for the growing wheat plants.
- Leveling: A leveled field guarantees:
- Even water distribution during irrigation.
- Simpler planting and harvesting processes.
- Utilize a laser leveler or traditional leveling tools for this task, especially in areas that rely on irrigation.

Application of Organic Matter
Enhancing soil fertility naturally boosts crop health and reduces reliance on chemical inputs:
- Organic Fertilizers: Mix well-decomposed farmyard manure, compost, or green manure into the soil during tilling. These materials: – Improve soil structure and moisture retention. – Provide slow-releasing nutrients throughout the growing season.
- Cover Crops: Plant legumes or other nitrogen-fixing plants during the off-season. Turning them into the soil before wheat planting enriches it with organic nitrogen.
- Mulching: Use plant residues or organic mulch to shield the soil from erosion and retain moisture.
By concentrating on thorough land preparation, farmers create an ideal environment for strong wheat growth, ensuring the best conditions for germination and early plant development.
Step 2: Selecting Quality Seeds
Selecting the right seeds is essential for successful wheat farming. Quality seeds not only boost yields but also increase resistance to pests, diseases, and environmental challenges.
Importance of Certified Seeds
Certified seeds are essential for achieving a successful wheat crop.
- Advantages of Certified Seeds:
- Purity: Certified seeds are guaranteed to be free from contaminants like weeds, other crop seeds, and inert materials.
- Germination Rates: These seeds undergo testing to confirm high germination rates.
- Resistance: They are specifically bred to resist diseases and tolerate environmental stress.
- Higher Yields: Utilizing certified seeds typically results in improved crop performance and greater productivity.
- Where to Source Certified Seeds:
- Buy from licensed dealers or agricultural research institutions.
- Make sure the seeds come with a certification tag that verifies their quality and origin. Using certified seeds helps eliminate the risks linked to poor-quality seeds, such as low germination rates or vulnerability to disease outbreaks.
Seed Treatment for Pests and Diseases
Seed treatment is a crucial process for safeguarding seeds and seedlings from pests and diseases during their initial growth stages.
- Fungicide Treatment: Apply fungicides to seeds to ward off fungal infections such as rust, smut, or root rot. Common options include Thiram and Carboxin.
- Insecticide Treatment: Use insecticides like Imidacloprid on seeds to defend against soil-borne pests such as termites and aphids.
- Biofertilizers and Growth Enhancers: Coat seeds with biofertilizers like Rhizobium or Azospirillum to improve nitrogen fixation. Incorporate growth-promoting hormones to enhance early vigor.
- Best Practices for Seed Treatment:
- Adhere to the recommended dosage of chemicals to protect the seeds.
- Ensure treatments are mixed uniformly for consistent protection.
- Dry treated seeds in the shade before planting to avoid clumping.
By choosing high-quality certified seeds and applying proper treatments, farmers can significantly mitigate risks, ensuring a robust start for their wheat crop.
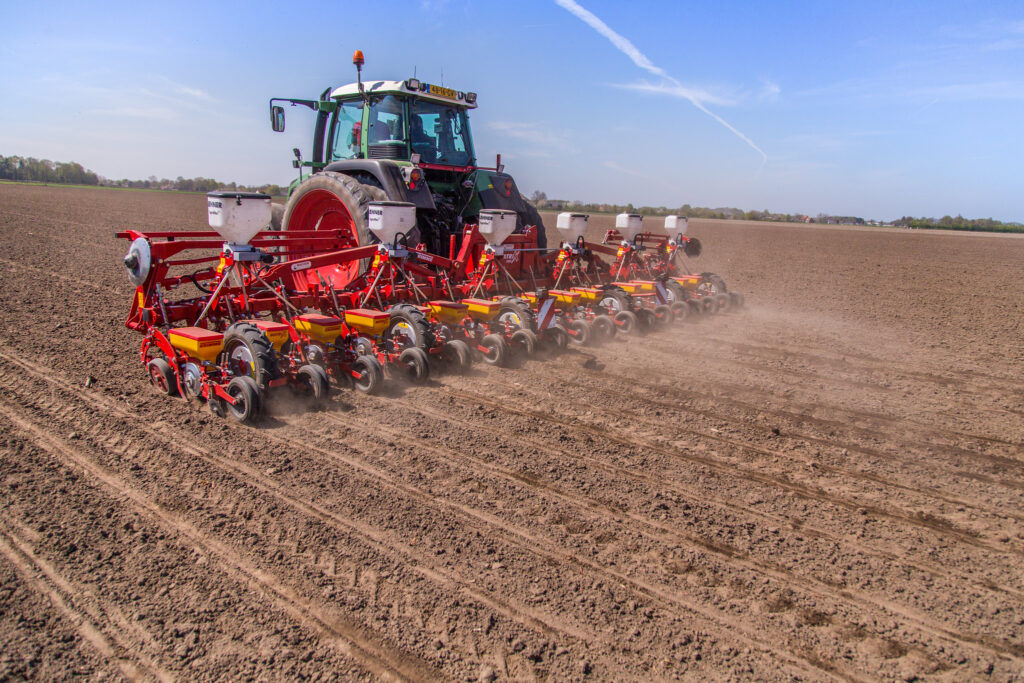
Step 3: Sowing Techniques
Effective sowing techniques are essential for maximizing wheat yields. This process requires precise timing, proper seed placement, and choosing the best sowing method suited to the specific region and available resources.
Optimal Sowing Time for Different Regions
The timing of wheat sowing plays a crucial role in germination, growth, and overall yield.
- Cool-Climate Regions:
- Ideal sowing period: Mid-October to mid-November.
- Early sowing helps to prevent frost damage during the flowering and grain filling stages.
- Warmer-Climate Regions:
- Ideal sowing period: Late-November to December.
- Sowing later in these areas helps the crop avoid high temperatures during maturity.
- Irrigated vs. Rainfed Areas:
- Irrigated fields: Can adhere to the standard sowing window.
- Rainfed fields: Timing is influenced by the availability of moisture from seasonal rainfall.
- Practical Tip: Always seek advice from local agricultural experts or extension services for sowing recommendations tailored to your region.
Seed Rate and Depth Guidelines
Getting the seed rate and depth correct is crucial for achieving uniform germination and establishing healthy crop stands.
- Seed Rate:
- Standard rate: 100–120 kg per hectare for most wheat varieties.
- Adjustments: Slightly increase the rate for late sowing or when conditions are less than ideal.
- Seed Depth: Ideal depth:
- 4–6 cm below the soil surface.
- Sowing too deep can delay emergence, while sowing too shallow may expose seeds to birds and pests.
- 4–6 cm below the soil surface.
- Row Spacing:
- Keep rows spaced 20–25 cm apart to ensure optimal sunlight exposure and nutrient absorption.
Sowing Methods
There are several methods for sowing wheat, which vary based on the size of the farm, the equipment available, and the budget.
- Broadcast Method: – Seeds are either scattered by hand or with a broadcasting machine.
- Pros: It’s straightforward and economical.
- Cons: This method can lead to uneven seed distribution and germination.
- Drilling Method: – Seeds are sown at a consistent depth using seed drills.
- Pros: This method promotes uniform germination and minimizes seed loss.
- Cons: It requires machinery, which might not be feasible for smaller farms.
- Precision Seeding: – This advanced technique employs precision seeders to accurately place seeds.
- Pros: It optimizes seed usage and maximizes yield.
- Cons: It comes with higher costs and demands technical know-how.
- Best Practice Tip: If resources permit, using a seed drill can enhance seed placement and improve yields.
By strategically planning the sowing schedule, selecting the right seed rate and depth, and choosing the most suitable sowing method, farmers can set the stage for a thriving wheat crop.
Step 4: Irrigation Scheduling
Irrigation scheduling involves figuring out the optimal timing and quantity of water to apply to crops, ensuring they grow robustly. Effective scheduling minimizes water waste, boosts yield, and aids in the efficient management of water resources.
Key factors to consider for irrigation scheduling:
- Soil Moisture Levels: Keep an eye on soil moisture at different depths to determine when irrigation is needed. You can use soil moisture sensors or perform manual checks like soil feel tests.
- Weather Conditions: Take into account factors like rainfall, temperature, and humidity. Over-irrigating can cause waterlogging, while not providing enough water can stress the crops.
- Growth Stage of Wheat: Wheat goes through various growth stages—germination, tillering, flowering, and maturity—each requiring different amounts of water. Make sure to adjust irrigation based on the crop’s needs at each stage.
- Evapotranspiration (ET): This refers to the total water loss from evaporation and transpiration. It can help estimate the water requirements for wheat over time.
- Time of Day: The best times for irrigation are early in the morning or late in the afternoon to minimize evaporation loss. It’s best to avoid irrigating during midday.
Irrigation schedules can be adjusted using the following methods:
- Fixed Interval Method: Water is applied at consistent intervals according to the wheat’s growth cycle.
- Soil Moisture-Based Method: Irrigation is carried out based on current soil moisture levels to ensure water is used only when necessary.
- Crop Water Requirement-Based Method: Watering is determined by the specific water requirements of wheat during various growth stages.
Common Irrigation Systems Used in Wheat Farming
Selecting the appropriate irrigation system involves considering factors such as water availability, field size, budget, and the climate of the region. Here are some common irrigation systems used in wheat farming:
- Surface Irrigation (Flood Irrigation)
- Description: Water is applied directly to the soil surface and allowed to flow across the field. This method is one of the oldest and simplest available.
- Advantages: It is cost-effective and easy to implement, especially in small fields.
- Disadvantages: This method can lead to inefficient water use, potential erosion, and is not ideal for large-scale or high-efficiency farming.
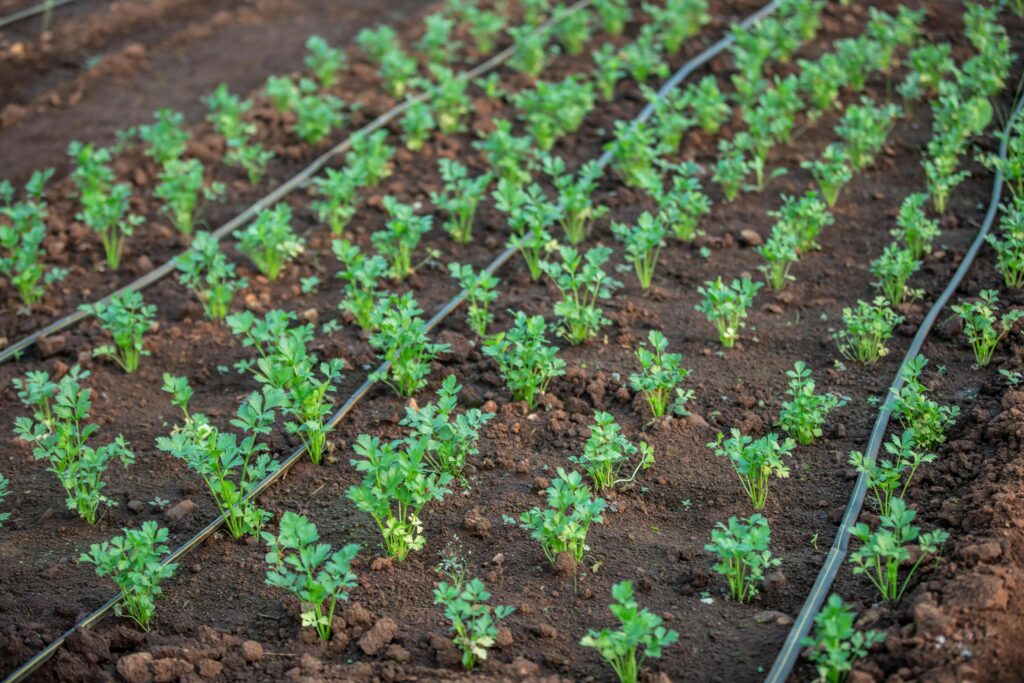
- Drip Irrigation
- Description: Water is delivered directly to the root zone through a network of tubes and emitters, making it a highly efficient system.
- Advantages: It minimizes water wastage, reduces evaporation, and boosts yield by providing targeted irrigation.
- Disadvantages: The initial setup cost can be high, it requires regular maintenance, and may not be practical for large-scale wheat farming.
- Sprinkler Irrigation
- Description: Water is sprayed over the crops in droplets, simulating natural rainfall.
- Advantages: This method is suitable for various field shapes and sizes, helps reduce soil erosion, and ensures even water distribution.
- Disadvantages: Installation and operational costs can be high, particularly in areas with limited water pressure.

- Center Pivot Irrigation
- Description: This system features a rotating sprinkler setup on wheeled towers that moves in a circular pattern, covering large fields.
- Advantages: It is very efficient for large-scale farming and can cover extensive areas with minimal labor.
- Disadvantages: The initial costs are high, and it requires a flat, even field for optimal operation.
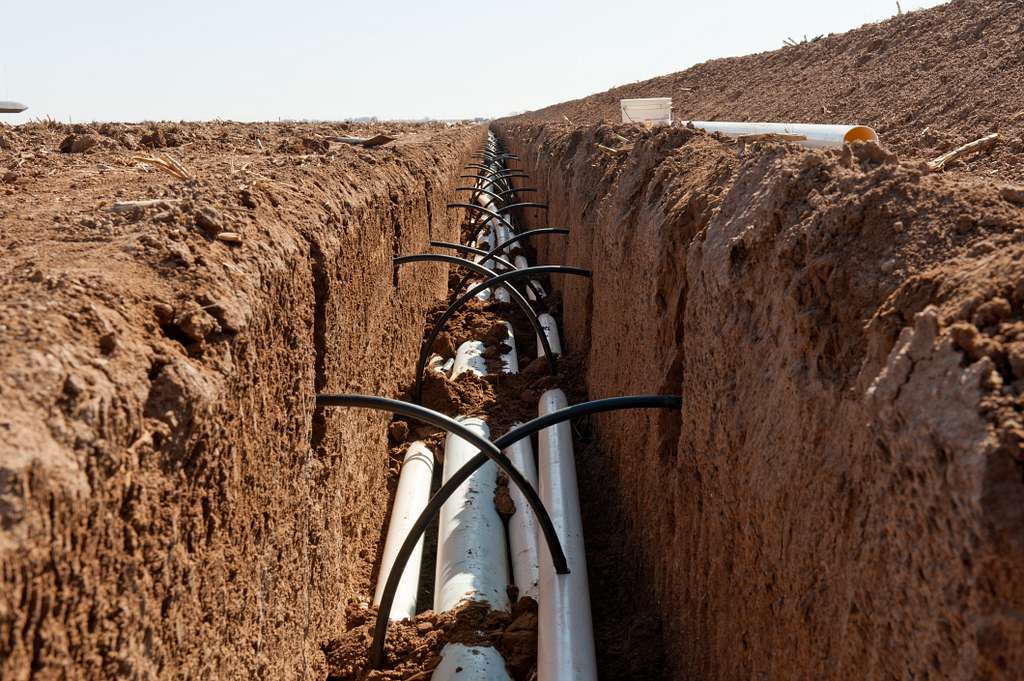
- Subsurface Drip Irrigation (SDI)
- Description: This is a variation of drip irrigation where the system is buried beneath the soil, delivering water directly to the roots.
- Advantages: It reduces evaporation and water wastage, making it ideal for high-value crops and areas with limited water resources.
- Disadvantages: The installation cost is high, and there is a risk of clogging.
Implementing effective irrigation scheduling and selecting the right irrigation system can greatly enhance wheat yield while conserving water resources. It’s important to choose methods that are both cost-effective and appropriate for your specific farming conditions.
Step 5: Nutrient Management,
Key Nutrients for Wheat Growth
Wheat plants need several essential nutrients for optimal growth, each contributing uniquely to their health and yield. These nutrients are divided into macronutrients and micronutrients.
- 1. Macronutrients (Primary Nutrients) These are needed in larger amounts and are crucial for the growth of wheat plants:
- Nitrogen (N): Essential for leaf and vegetative growth, nitrogen boosts protein production and photosynthesis. A lack of nitrogen results in yellowing leaves and stunted growth.
- Phosphorus (P): Key for root development, energy transfer, and the formation of flowers and seeds. It promotes robust root systems and improves nutrient absorption.
- Potassium (K): Important for water regulation, disease resistance, and photosynthesis. Potassium contributes to overall plant health and optimal grain development.
- 2. Secondary Nutrients These are required in smaller amounts but are still vital for wheat growth:
- Calcium (Ca): Supports cell wall structure, root development, and nutrient absorption.
- Magnesium (Mg): A key component of chlorophyll, magnesium is important for photosynthesis.
- Sulfur (S): Necessary for protein synthesis and overall plant metabolism.
- 3. Micronutrients Though needed in much smaller quantities, micronutrients are critical for various enzymatic and metabolic functions:
- Iron (Fe) Zinc (Zn) Manganese (Mn) Copper (Cu) Boron (B) Molybdenum (Mo)
Fertilizer Application Timelines
Applying the right fertilizers at the right time is essential for ensuring that wheat crops have access to the nutrients they need. The timing of fertilizer application should align with the crop’s growth stages to optimize nutrient uptake when it is most critical.
- 1. Pre-planting Fertilization (Before Sowing)
- Fertilizers are applied prior to planting to supply vital nutrients that aid in early seedling development.
- Common fertilizers: Phosphorus and potassium-based fertilizers.
- Application tip: Mix fertilizers into the soil during tillage or before planting.
- 2. Early Growth Stage (Tillering Phase)
- Nitrogen plays a key role during the early growth stage, especially when wheat plants are actively growing and producing leaves.
- Application tip: Use split doses of nitrogen fertilizers to minimize leaching and maintain a consistent nutrient supply.
- 3. Flowering and Grain Development (Reproductive Stages)
- During the flowering and grain-filling stages, wheat requires extra nutrients, particularly nitrogen. At this point, potassium, magnesium, and sulfur also become crucial for grain development.
- Application tip: Apply nitrogen and potassium as necessary to enhance grain yield and quality.
- 4. Post-harvest Fertilization
- After harvesting, it may be necessary to replenish soil nutrient levels based on what the crop has removed. Fertilizing post-harvest prepares the soil for the next planting cycle.
- Application tip: Use organic or balanced fertilizers to enhance soil structure and restore nutrients.
Organic vs. Chemical Fertilizers
When choosing between organic and chemical fertilizers, it’s essential to consider the advantages and disadvantages based on your farm’s specific conditions, the needs of your crops, and your long-term sustainability objectives.
- 1. Organic Fertilizers
- Examples: Compost, manure, bone meal, and plant-based organic fertilizers.
- Advantages: – Improve soil health by increasing organic matter, enhancing structure, and boosting microbial activity. – Release nutrients slowly, which minimizes the risk of leaching. – Eco-friendly and support long-term sustainability.
- Disadvantages: – Nutrient release is slower, meaning it may take longer to see results. – Often have lower nutrient concentrations, requiring larger amounts to fulfill wheat’s nutrient requirements. – Can be expensive and challenging to apply on a large scale.
- 2. Chemical Fertilizers
- Examples: Urea, ammonium nitrate, superphosphate, and potassium chloride.
- Advantages: – Deliver nutrients quickly, promoting rapid plant growth. – Higher nutrient concentrations make them effective for large-scale agriculture. – Allow for more precise application and require less labor.
- Disadvantages: – Excessive use can damage soil health by depleting organic matter and reducing biodiversity. – There is a risk of nutrient leaching and water pollution, particularly in poorly managed irrigation areas. – Over time, they can cause soil acidification or disrupt the balance of soil nutrients.
Choosing the Right Fertilizer
Many wheat farmers choose to use a mix of organic and chemical fertilizers, a practice known as integrated nutrient management (INM), to take advantage of the benefits each type offers. Organic fertilizers enhance soil structure and health over time, while chemical fertilizers deliver quick nutrients necessary for fast crop growth. Effective nutrient management and careful fertilizer application are crucial for boosting wheat yields while preserving soil health. By applying the appropriate fertilizers at the right times, you can ensure that your wheat crops get the nutrients they require for optimal growth and development.
Step 6: Weed Management,
The emphasis is on managing weeds that vie with wheat for water, nutrients, and light. Implementing effective weed control strategies is crucial for promoting the healthy growth of wheat and optimizing yield potential. Below is a comprehensive overview of common weeds found in wheat fields and the approaches to manage them:
Common Weeds in Wheat Fields
Weeds are unwanted plants that grow in wheat fields, competing for essential resources. Some common weeds found in wheat farming include:
- Wild Oats (Avena fatua)
- Description: Wild oats are a significant weed in wheat fields, often causing issues because they closely resemble wheat plants, making them hard to spot until harvest. They compete for vital nutrients and water.
- Control: Herbicides can be effective, but early management is crucial to prevent seed spread.

- Henbit (Lamium amplexicaule)
- Description: This broadleaf weed thrives in cool-season crops and moist conditions, often overtaking wheat crops, especially during their early growth stages.
- Control: Applying herbicides on time or manually removing the weed can help keep it in check.

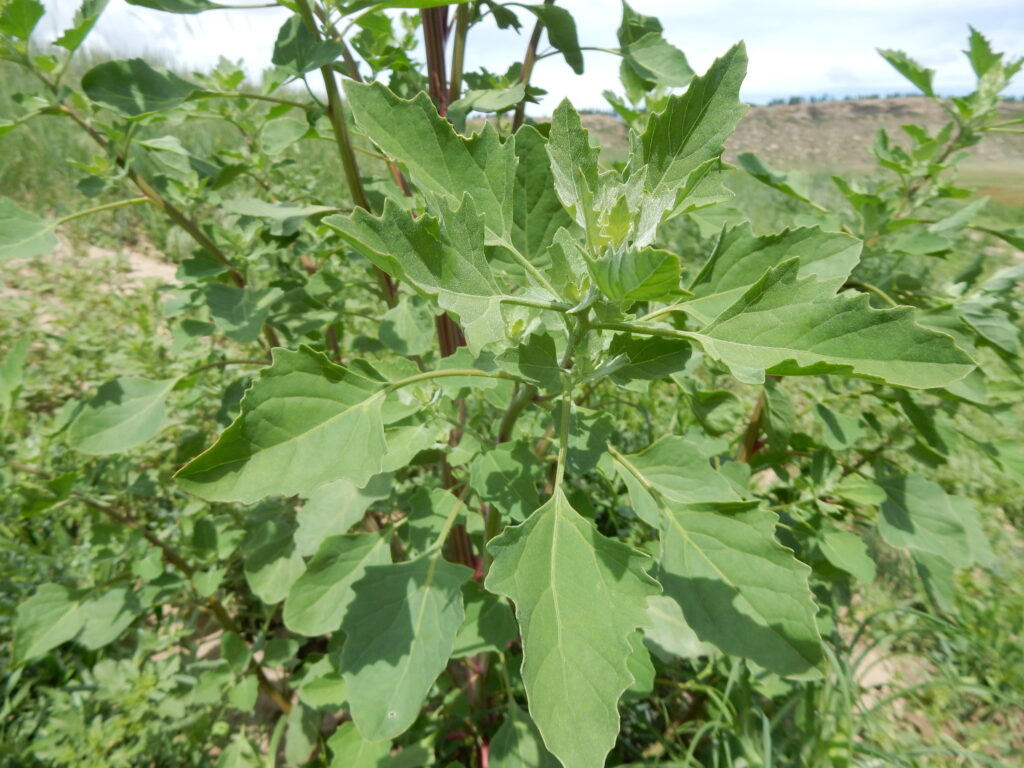
- Common Lambsquarters (Chenopodium album)
- Description: Known for its rapid growth, lambsquarters is another broadleaf weed that competes with wheat for light and nutrients.
- Control: Using pre-emergence herbicides and tilling can help reduce its population.
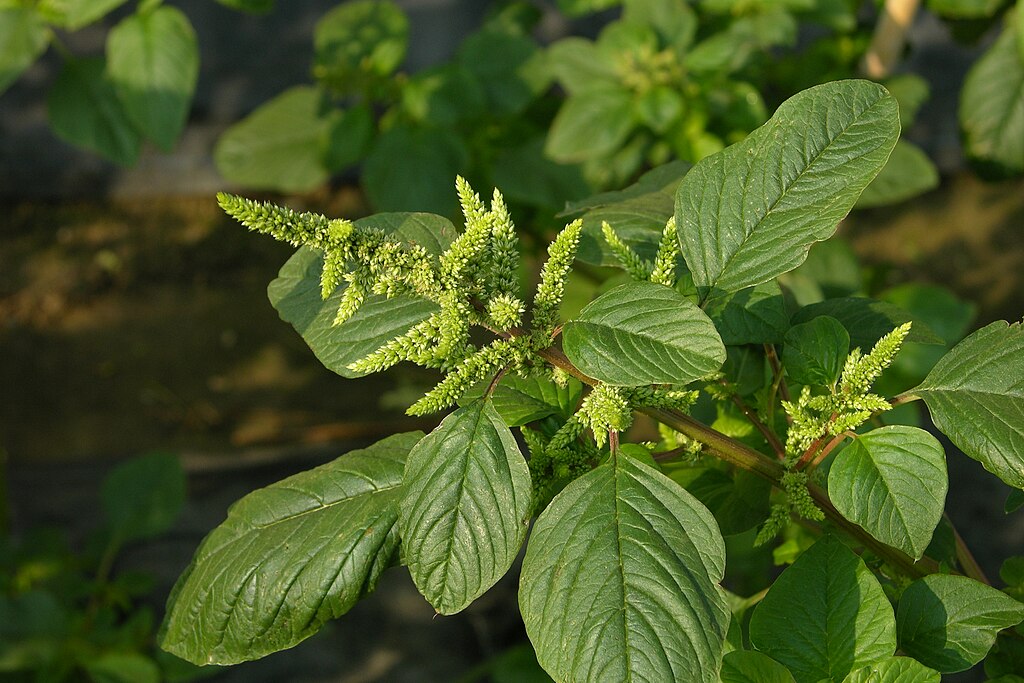
- Pigweed (Amaranthus spp.)
- Description: Pigweed is a robust and fast-growing weed that can form dense stands, making it challenging to eliminate once established.
- Control: Regular herbicide applications combined with cultural practices like crop rotation can be effective.
- Foxtail (Setaria spp.)
- Description: This grass weed competes with wheat for nutrients and space. Foxtail is particularly troublesome due to its rapid spread, which can lead to lodging in wheat plants.
- Control: Employing grass-specific herbicides and proper crop rotation is recommended.

- Mustard Weeds (Brassica spp.)
- Description: Mustard weeds can invade wheat fields, competing for water and nutrients, and may also harbor diseases that affect wheat plants.
- Control: Herbicides and effective soil management practices can help control mustard weeds.

Manual, Mechanical, and Chemical Control Methods
There are several methods for controlling weeds in wheat fields, including manual, mechanical, and chemical approaches. Here’s a breakdown of each method:
- 1. Manual Weed Control
- Description: This method involves removing weeds by hand or using simple tools, making it ideal for small-scale farms or areas with fewer weeds.
- Methods: –
- Hand Weeding: Manually pulling weeds can be effective, but it requires a lot of labor, especially in larger fields. –
- Hoeing: Utilizing hoes or weeders to eliminate weeds close to the wheat plants.
- Advantages: – No chemicals are used, which is better for the environment. – Particularly suitable for organic farming or smaller fields.
- Disadvantages: – It can be labor-intensive and time-consuming. – May not work well in larger fields or where weeds are densely packed.
- 2. Mechanical Weed Control
- Description: This approach employs equipment to physically remove or disrupt weed growth. It’s effective for larger farms and can complement other methods.
- Methods: –
- Tillage: Plowing or harrowing the soil to uproot weeds before planting or during the growing season, which exposes weed seeds to sunlight and decreases their viability.
- Mowing and Cutting: For established weeds, mowing or cutting them down before they can seed helps control their spread.
- Weed Pullers and Seeders: Specialized machines can remove weeds from fields without damaging the wheat crop.
- Advantages: – Works well for large areas with significant weed populations. – Reduces dependence on chemical solutions.
- Disadvantages: – Can disrupt soil structure and potentially cause erosion if not done correctly. – Requires investment in machinery and ongoing maintenance.
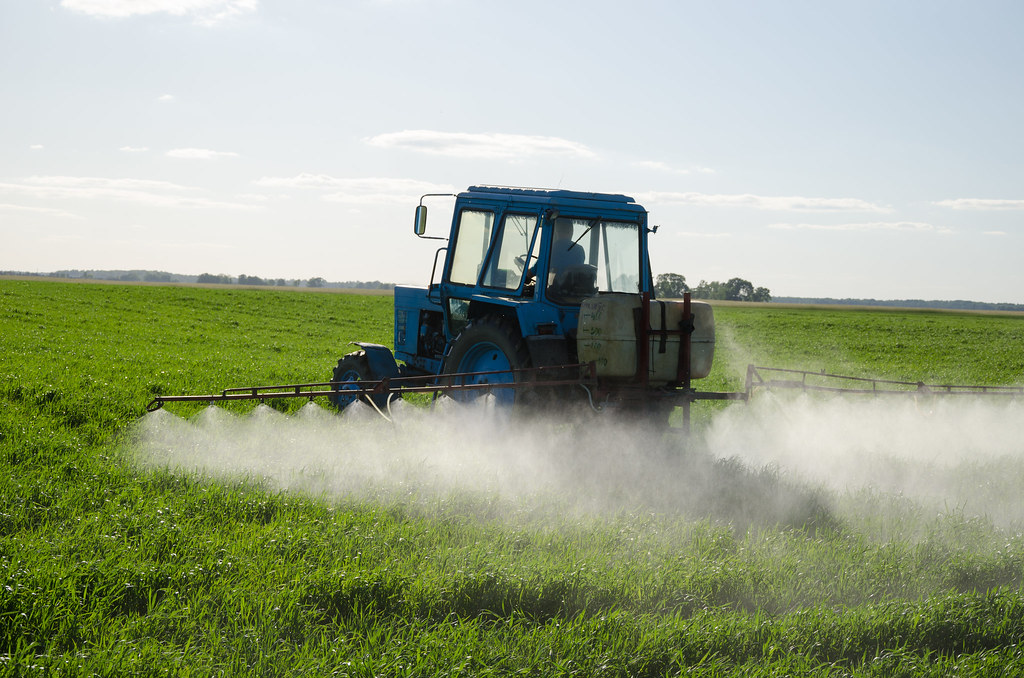
- 3. Chemical Weed Control (Herbicides)
- Description: Herbicides are substances specifically formulated to eliminate or suppress the growth of weeds. This method of chemical control is the most prevalent, particularly in extensive wheat farming operations.
- Types of Herbicides:
- Pre-emergence Herbicides: These are applied prior to the germination of weed seeds. They form a protective barrier in the soil that inhibits weed growth.
- Post-emergence Herbicides: These are used after both the wheat crop and weeds have emerged, targeting actively growing weeds.
- Selective Herbicides: These are formulated to eliminate only certain types of weeds while leaving the wheat crop unharmed.
- Non-selective Herbicides: These kill all vegetation, including the wheat crop, and should be used with caution.
- Advantages: – Highly effective in managing a broad range of weeds. – Saves time and labor, making it ideal for large-scale agricultural operations.
- Disadvantages: – Excessive use of herbicides can result in weed populations developing resistance. – There is a risk of environmental contamination if not applied properly. – A solid understanding of herbicide types and application methods is necessary to avoid harming the wheat crop.
- Integrated Weed Management (IWM) While manual, mechanical, and chemical methods can be effective on their own, Integrated Weed Management (IWM) brings these strategies together for sustainable weed control. IWM includes:
- Crop Rotation: Alternating wheat with other crops that have different growth patterns can help disrupt the weed cycle.
- Cover Crops: Growing cover crops to inhibit weed growth during the off-season.
- Herbicide Rotation: Regularly switching herbicide types to minimize the risk of weeds developing resistance.
Effective weed management allows wheat plants to access the necessary resources for growth without competition from weeds. By using a mix of manual, mechanical, and chemical control methods, farmers can keep their fields free of weeds, resulting in healthier crops and improved yields.
Step 7: Pest and Disease Management
Managing pests and diseases effectively is vital to avoid losing crops in wheat farming. Quick identification and appropriate treatments are key to achieving the best possible wheat yield.
Identifying Major Pests and Diseases in Wheat
Major Pests
1. Wheat Aphids
- Symptoms: Yellowing leaves, stunted growth.
- Control: Insecticides, natural predators like ladybugs.

2. Armyworms
- Symptoms: Defoliation and leaf damage.
- Control: Insecticides, biological controls, and crop rotation.

3. Wheat Stem Sawfly
- Symptoms: Yellowing stems and lodging.
- Control: Resistant varieties, early harvesting.
4. Wheat Weevil
- Symptoms: Holes in grains, reduced seed viability.
- Control: Proper storage, fumigation.

Major Diseases
1. Rust Diseases
- Symptoms: Rust-colored pustules, yellowing leaves.
- Control: Resistant varieties, fungicide, crop rotation.

2. Fusarium Head Blight
- Symptoms: Bleached heads, mycotoxin production.
- Control: Resistant varieties, fungicide during flowering.
3. Septoria Leaf Spot
- Symptoms: Dark lesions on leaves.
- Control: Fungicide, remove infected material.

4. Wheat Yellow Mosaic Virus
- Symptoms: Yellowing leaves, stunted growth.
- Control: Virus-resistant varieties, aphid control.

Preventive Measures and Treatments
Preventive Measures
- 1. Crop Rotation: This practice helps minimize the buildup of pests and diseases by alternating wheat with non-cereal crops.
- 2. Resistant Varieties: Choose wheat varieties that are resistant to specific pests and diseases.
- 3. Field Hygiene: Keep fields clean by removing plant debris and weeds to limit pest habitats.
- 4. Proper Irrigation/Fertilization: Ensure that irrigation and fertilization are balanced to avoid stressing the plants.
- 5. Integrated Pest Management (IPM): Utilize a combination of cultural, biological, and chemical methods for sustainable pest control.
Treatments
- 1. Chemical Control: Use insecticides and fungicides as necessary to manage pests and diseases.
- 2. Biological Control: Introduce natural predators, such as ladybugs, and beneficial microorganisms to combat pests and diseases.
- 3. Cultural Control: Modify planting density, timing, and consider early harvesting to lessen pest effects.
- 4. Biological Fungicides: Opt for eco-friendly fungicides to tackle diseases like rust and Fusarium.
By integrating these preventive measures and treatments, farmers can safeguard their wheat crops from pests and diseases, leading to healthier plants and improved yields.
Step 8: Harvesting
Harvesting wheat at the optimal time and employing the right techniques are crucial for achieving the best yield and quality. Here’s a summary of the important factors to consider during wheat harvesting.
Identifying the Right Time to Harvest
Indicators for Harvesting
- Kernel Hardness: The wheat grains should feel firm and hard. You can test this by squeezing a grain between your fingers—if it doesn’t dent, it’s ready for harvest.
- Color Change: As the wheat ripens, the kernels will shift from green to a golden hue.
- Moisture Content: The best time to harvest wheat is when the moisture content is between 12-14%. This range helps ensure optimal storage and reduces the risk of mold.
- Field Signs: When around 90% of the crop has turned golden and the lower leaves begin to dry out, it’s usually the right moment to harvest.
Manual vs. Mechanical Harvesting Techniques
- 1. Manual Harvesting
- Description: This method involves cutting wheat by hand with tools like sickles or scythes.
- Advantages: – Well-suited for small-scale or organic farming. – Requires a lower initial investment.
- Disadvantages: – It is labor-intensive and takes a considerable amount of time. – Less efficient when compared to mechanical harvesting.
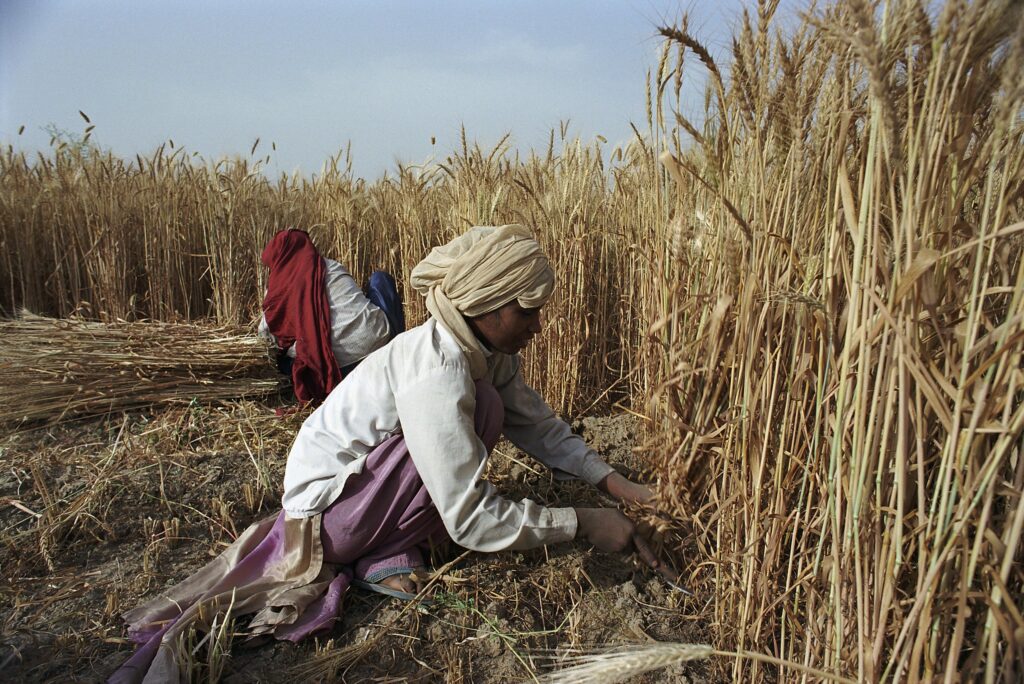
World Bank Photo Collection, Licensed under CC BY-NC-ND 2.0
- 2. Mechanical Harvesting
- Description: This technique employs combine harvesters that can cut, thresh, and clean the wheat all in one go.
- Advantages: – Extremely efficient, which helps to cut down on time and labor costs. – Perfect for large-scale wheat farming operations.
- Disadvantages: – The initial cost of the equipment is quite high. – Skilled operators are necessary to ensure effective use.
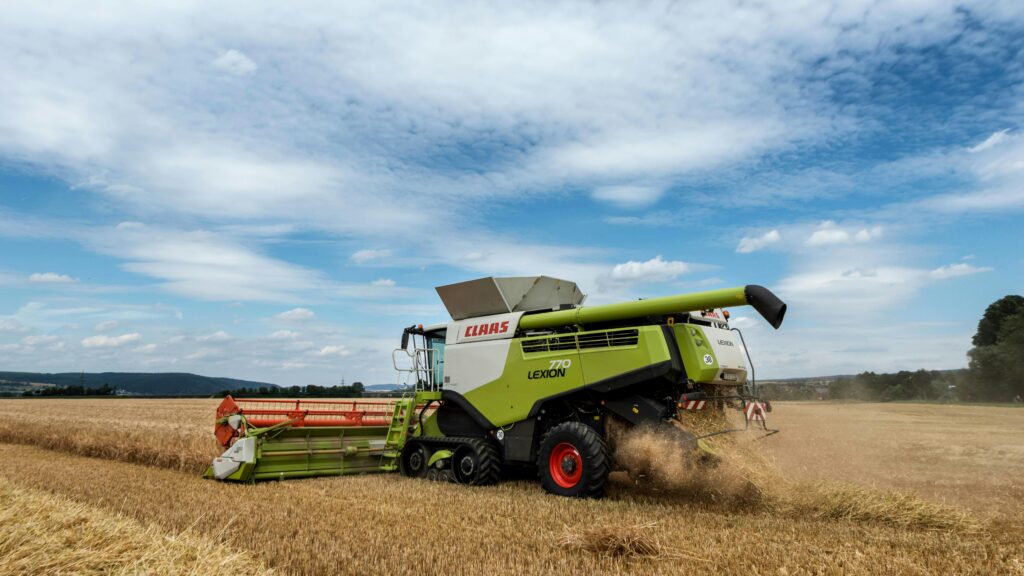
Selecting the appropriate timing and technique for harvesting is essential for preserving the quality and yield of wheat. For larger farms, mechanical harvesting is usually favored because of its speed and efficiency, whereas manual harvesting might be more suitable for smaller-scale operations.
Step 9: Post-Harvesting
Effective post-harvesting practices are crucial for preserving the quality of wheat and ensuring it arrives at the market in the best possible condition. Here are the key steps to take after the harvest.
Threshing, Cleaning, and Drying
- 1. Threshing
- Description: Threshing is the method of separating wheat grains from the chaff, which includes the inedible parts like husks and straw.
- Methods:
- Manual Threshing: This technique is often employed in small-scale farming, where the wheat ears are beaten to release the grains.
- Mechanical Threshing: A machine, such as a combine harvester or threshing machine, is utilized to quickly and efficiently separate the grains.
- 2. Cleaning
- Description: Following threshing, cleaning is essential to eliminate any leftover debris, including dust, dirt, and small straw pieces.
- Methods:
- Manual Cleaning: This involves using sieves or hand tools to remove unwanted materials.
- Mechanical Cleaning: For larger operations, grain cleaners and air blowers are used to ensure the wheat is free from impurities.
- 3. Drying
- Description: Drying is the process of lowering the moisture content of the wheat to a safe storage level, typically between 12-14%.
- Methods:
- Sun Drying: This method involves spreading the grains out on the ground to dry in the sun.
- Mechanical Drying: Grain dryers are employed to expedite the drying process, particularly in regions with high humidity or unpredictable weather.
Storage Techniques to Prevent Spoilage
- 1. Proper Storage Conditions
- Temperature: It’s important to keep wheat in a cool, dry area to avoid mold.
- Humidity Control: Store grain in containers that help maintain low humidity levels to stop fungal growth.
- Ventilation: Make sure storage units have good ventilation to promote air circulation, which helps reduce spoilage.
- 2. Storage Methods Bags or Sacks: These are often used for smaller amounts, particularly in rural or traditional settings.
- Silos: Large farms typically utilize silos equipped with systems to control temperature and moisture for bulk wheat storage.
- Palletized Storage: This method involves keeping grain in bulk on pallets, allowing for airflow to prevent spoilage and pest issues.
- 3. Pest Control in Storage
- Natural Repellents: Consider using neem leaves or diatomaceous earth to keep pests away.
- Fumigation: If there are significant pest problems, chemical treatments may be necessary.
Transportation to Markets
- 1. Transportation Methods
- Road Transport: Trucks are often utilized to deliver wheat to nearby markets, mills, or silos.
- Rail and Sea: For larger shipments, wheat can be transported by rail or sea, particularly for export purposes.
- 2. Ensuring Quality During Transport
- Packaging: Using appropriate packaging (like sacks and sealed containers) helps safeguard wheat from contamination and physical harm during transit.
- Timely Delivery: Fast transportation minimizes the risk of spoilage and guarantees that fresh wheat arrives at the market.
Effective post-harvest management, which includes threshing, cleaning, drying, and proper storage techniques, is essential for maintaining wheat quality and ensuring it can be successfully transported to markets for sale.
Technologies and Innovations in Wheat Farming
Embracing modern technologies and innovations in wheat farming can greatly enhance productivity, efficiency, and sustainability. Here are some key technological advancements that are transforming the wheat farming landscape.
Use of Machinery and Tools
- 1. Tractors and Implements
- Description: Tractors fitted with various implements like plows, seeders, and sprayers boost efficiency in preparing land, planting seeds, and maintaining crops.
- Benefits: They lower labor costs, accelerate fieldwork, and enhance precision in planting and fertilization.
- 2. Combine Harvesters
- Description: Combine harvesters are designed to cut, thresh, and clean wheat all at once, minimizing the need for manual labor.
- Benefits: They speed up the harvesting process and decrease crop loss, particularly beneficial for large-scale farming.
- 3. Seed Drills
- Description: Seed drills ensure consistent planting depth and spacing, which is crucial for optimizing wheat growth.
- Benefits: They facilitate efficient seed placement, minimize waste, and enhance crop uniformity.
Role of Precision Agriculture and Drones
- 1. Precision Agriculture
- Description: Precision agriculture utilizes technology to monitor and manage the variability within fields. By employing GPS, sensors, and mapping software, farmers can apply resources such as water, fertilizers, and pesticides only in the areas that require them.
- Benefits:
- Cost-Efficiency: Lowers input costs by ensuring resources are applied accurately.
- Sustainability: Reduces environmental impact by avoiding the overuse of chemicals and water.
- Increased Yields: Enhances growing conditions, resulting in healthier crops and improved yields.
- 2. Drones
- Description: Drones fitted with cameras and sensors offer real-time aerial imagery of wheat fields.
- Benefits:
- Crop Monitoring: Drones can identify early signs of pest problems, diseases, or water shortages.
- Mapping and Surveys: Deliver precise field maps for improved planning and resource management.
- Fertilizer and Pesticide Application: Drones enable targeted spraying, which decreases chemical usage and enhances application accuracy.
Digital Tools for Monitoring Crops
- 1. Crop Management Software
- Description: These software platforms enable farmers to keep track of field data, manage crop schedules, and monitor the growth of their crops.
- Benefits: Enhances decision-making by offering actionable insights into crop health, growth stages, and input requirements.
- 2. Soil Sensors
- Description: These devices measure soil moisture, temperature, and nutrient levels in real-time.
- Benefits:
- Optimized Irrigation: Ensures crops are watered only when needed, conserving water and supporting healthy root development.
- Fertilizer Management: Identifies the optimal timing and placement for fertilizer application to maximize effectiveness.
- 3. Weather Stations and Apps
- Description: On-site weather stations and mobile apps deliver localized forecasts and data on temperature, rainfall, and humidity.
- Benefits: Aids farmers in making informed choices regarding irrigation, planting, and pest management.
By adopting modern machinery, precision agriculture techniques, and digital tools, wheat farmers can optimize their resources, lower costs, and enhance crop management, ultimately resulting in higher yields and more sustainable farming practices.
Practical Tips for Successful Wheat Farming
To achieve a successful wheat crop, farmers should prioritize cost optimization and sustainable practices. Here are some practical tips to improve productivity and profitability in wheat farming.
Cost Optimization Strategies
- 1. Efficient Irrigation Practices
- Drip Irrigation: Implement drip irrigation systems to provide water directly to the roots of plants, which helps minimize water waste and cut down on irrigation expenses.
- Rainwater Harvesting: Set up rainwater harvesting systems to lessen dependence on expensive water sources, especially in regions with unpredictable rainfall.
- 2. Bulk Buying of Inputs
- Bulk Purchase: Acquire seeds, fertilizers, and pesticides in larger quantities to take advantage of discounts and lower the cost per unit.
- Cooperatives: Collaborate with other farmers by joining or forming cooperatives to collectively purchase inputs and reduce expenses.
- 3. Use of Precision Farming Technologies
- Variable Rate Technology (VRT): Utilize GPS and sensors to apply fertilizers, water, and pesticides only where necessary, which helps lower input costs and lessen environmental impact.
- Data-Driven Decisions: Leverage digital tools and applications to make informed choices based on real-time data, allowing for efficient resource allocation.
- 4. Crop Rotation
- Alternating Crops: Practice crop rotation by alternating wheat with legumes or other crops to enhance soil health and decrease reliance on chemical fertilizers, ultimately saving money over time.
- 5. Preventive Pest and Disease Management
- IPM (Integrated Pest Management): Employ preventative measures, such as introducing beneficial insects, rotating crops, and maintaining proper field sanitation, to reduce the need for costly chemical treatments.
Ensuring Sustainability in Wheat Farming
- 1. Soil Conservation Practices
- Conservation Tillage: Reduce tillage to maintain soil structure, limit erosion, and keep soil moisture intact.
- Cover Crops: Plant cover crops like legumes to enhance soil fertility, prevent erosion, and control weeds.
- 2. Water Conservation
- Efficient Water Use: Utilize technologies such as drip irrigation or sprinklers to minimize water waste.
- Mulching: Use mulch to help retain soil moisture and decrease evaporation, particularly during dry spells.
- 3. Organic Fertilizers
- Composting: Apply organic compost to enhance soil structure, increase nutrient levels, and lessen reliance on chemical fertilizers.
- Animal Manure: Mix animal manure into the soil to naturally enrich it with vital nutrients.
- 4. Biodiversity and Pest Control
- Encourage Beneficial Insects: Cultivate flowers and plants that attract beneficial insects like ladybugs to help manage pests naturally.
- Biological Pest Control: Use natural predators or biopesticides to manage pest populations instead of depending solely on chemical pesticides.
- 5. Climate Smart Practices
- Drought-Resistant Varieties: Choose wheat varieties that are drought-resistant or well-suited to the local climate to reduce water and resource requirements.
- Adapt to Climate Change: Keep informed about climate trends and modify farming practices, such as planting schedules, irrigation timing, and pest management, as needed.
By prioritizing cost efficiency and sustainable farming methods, wheat farmers can enhance their profits while also supporting long-term environmental health and agricultural resilience.
Conclusion
Wheat farming is a challenging yet fulfilling activity that demands meticulous planning and execution throughout the process. By concentrating on essential aspects such as land preparation, irrigation, nutrient management, pest control, and post-harvest practices, farmers can maximize their yields and maintain the quality of their crops. Adopting modern technologies like precision farming, drones, and digital tools can also improve efficiency and sustainability in wheat farming.
Recap of Key Points
- Soil Health: Maintain high soil quality by practicing proper tillage, rotating crops, and adding organic matter.
- Water Management: Use efficient irrigation systems and prioritize the conservation of water resources.
- Nutrient Management: Apply fertilizers at the appropriate times and in suitable amounts to support healthy wheat growth.
- Pest and Disease Control: Employ a mix of manual, mechanical, and chemical methods to safeguard crops.
- Post-Harvesting: Adhere to proper techniques for threshing, cleaning, drying, and storing to preserve wheat quality.
- Technological Integration: Utilize machinery, precision agriculture, drones, and digital tools to enhance farming practices.
- Cost Optimization & Sustainability: Aim to lower costs through bulk purchasing, smart irrigation, and sustainable methods like organic fertilizers and promoting biodiversity.
Encouragement to Implement the Steps
While implementing these steps may take some effort and investment, the long-term advantages—such as higher yields, lower costs, and improved sustainability—are definitely worthwhile. By embracing modern farming techniques and effective management practices, farmers can position themselves for greater success in wheat farming.
Call to Action for Farmers to Share Their Experiences
We invite farmers to share their experiences, tips, and success stories with the community. By exchanging knowledge and learning from each other, we can all help enhance wheat farming practices. Together, we can create a sustainable and productive future for wheat farming. Please feel free to share your insights and any challenges you’ve encountered in your farming journey!